How to Get a Salon-Quality Press-On Nail Set at Home (Without Breaking the Bank)
It’s January again—the month when money feels tight, motivation is low, and treating yourself seems like a luxury. But here’s the thing: you can feel pampered without emptying your wallet. My favorite hack? Press-on nails.
I know, I know—some of you are thinking: “They don’t last,” “They’re flimsy,” “Applying them is a pain!”But hear me out. With a little prep and the right technique, press-ons can actually last, look salon-quality, and cost just a fraction of the price. Think £5 for a fresh, glossy set you can do in your own home. Not bad, right?
Here’s how to make them stick around longer and feel less like a chore.
⸻
Step 1: Gather Your Tools and Nail Sets
Before we start, you’ll need:
Press-on nails:
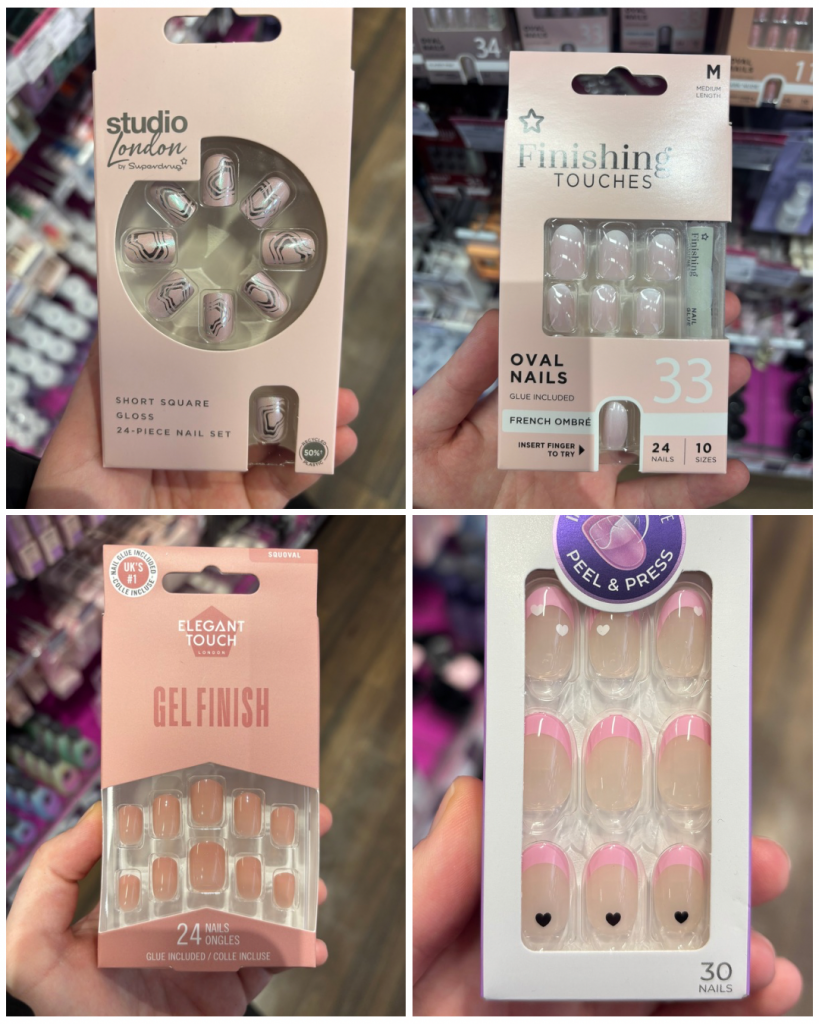
All of these brands are available at Superdrug and fall into the more affordable price range, typically between £4–£8. While there are cheaper options out there, I find these offer great quality for the price.
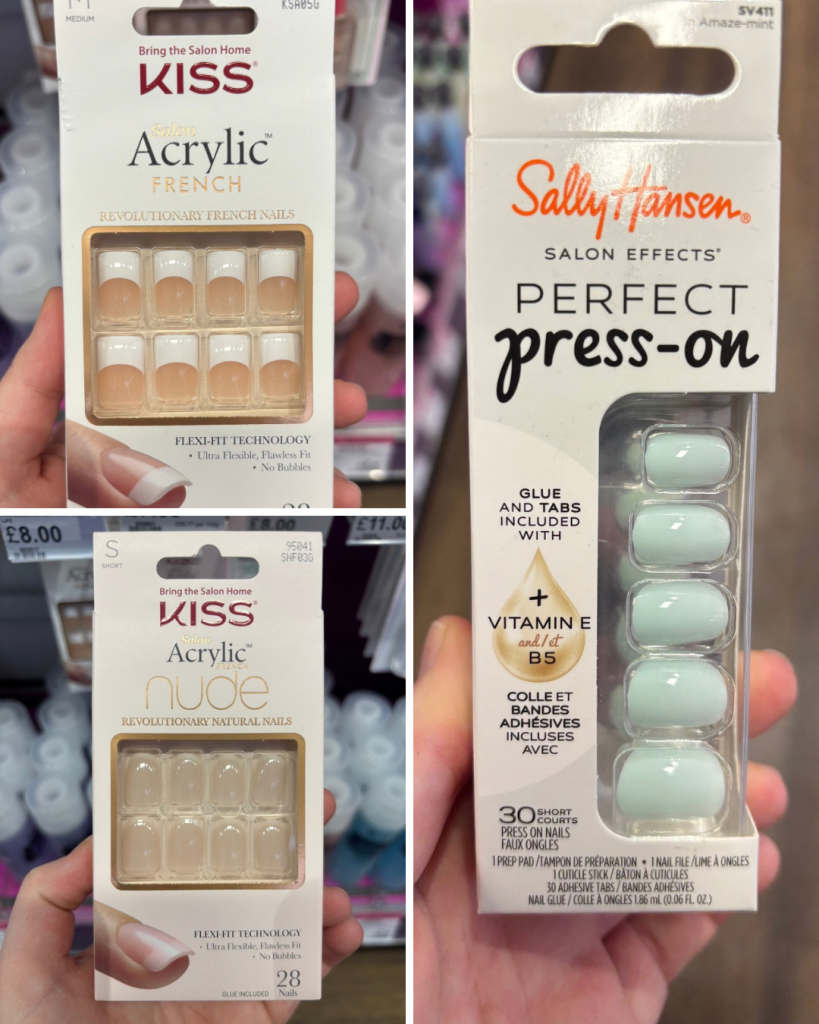
If you’re happy to spend a little more, brands such as KISS and Sally Hansen are generally sturdier and longer-lasting. They do come at a higher price point, usually around £9–£12, but the extra durability can be worth it.
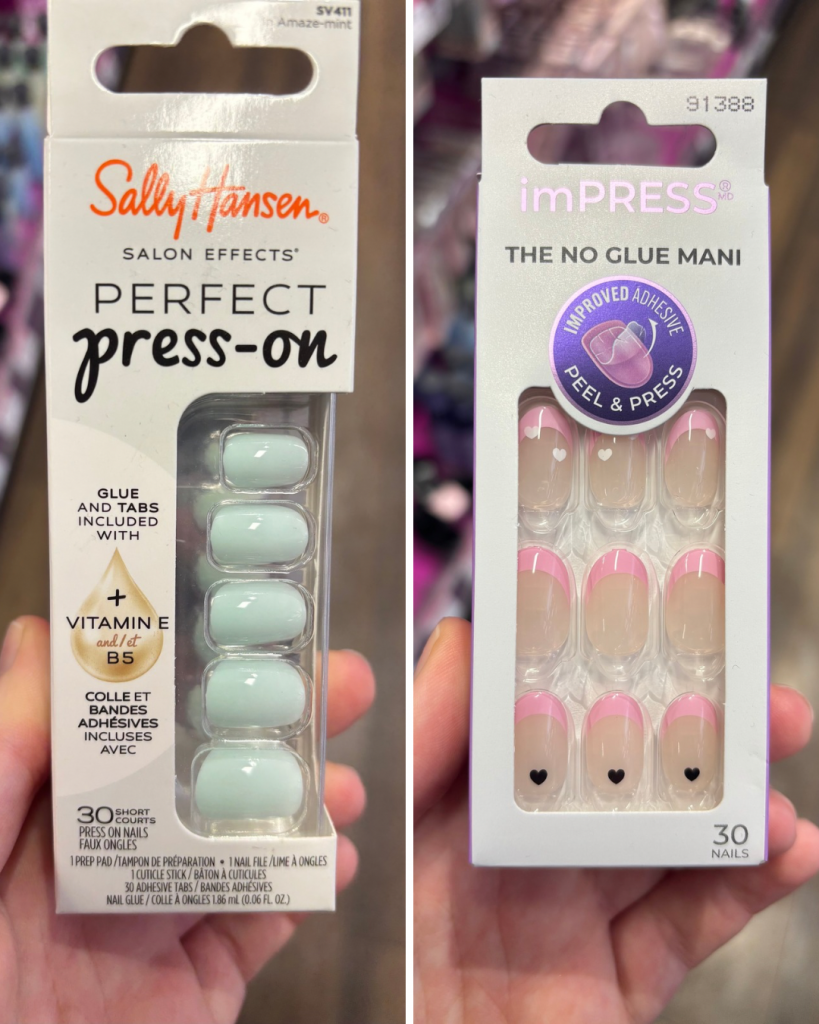
For an easier, low-effort option, you can also try no-glue press-on nails that come with adhesive tabs already attached. These are quick and convenient, especially if you don’t want to use extra tools. However, in my experience, they’re not as secure or long-lasting as press-ons applied with liquid glue. Again, these can be lower cost such as drug store own brands or the higher cost brands also supply these. If you are going to go with this style, I would recommend the higher cost brands as they will have better adhesive.
Tools for a flawless application:
• Nail file
• Cuticle pusher (or orange stick)
• Nail clippers
• Nail dehydrator (optional but recommended)
• Nail glue (choose a strong, reliable one)
⸻
Step 2: Prep Your Nails (This Is Key!)
The secret to press-ons that last is all in the prep. Slapping glue on and sticking nails to your fingers is easy—but if you skip these steps, they won’t last.
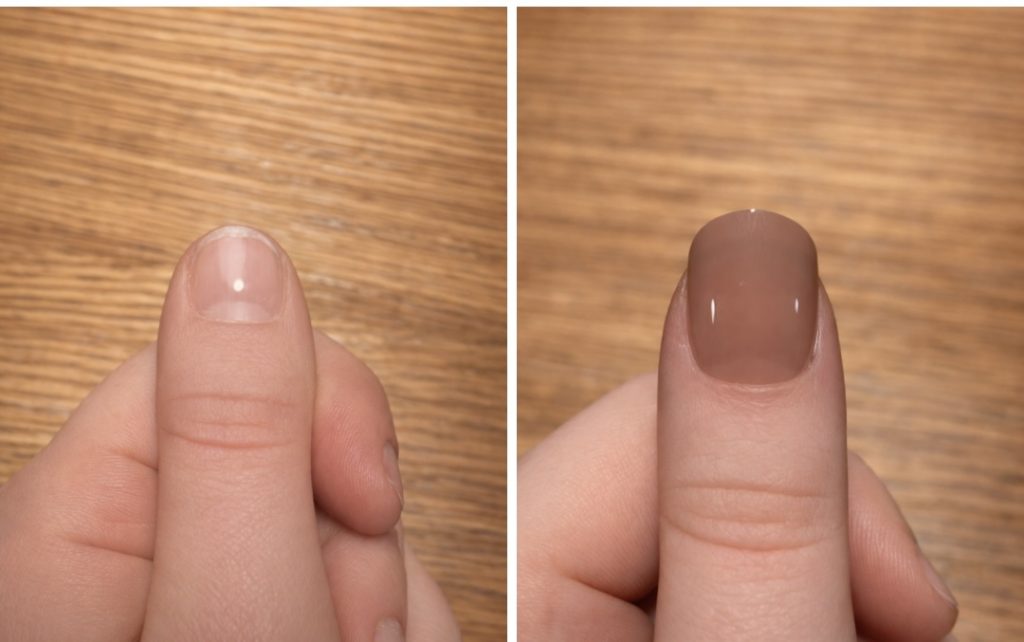
Filing and Cuticle Prep
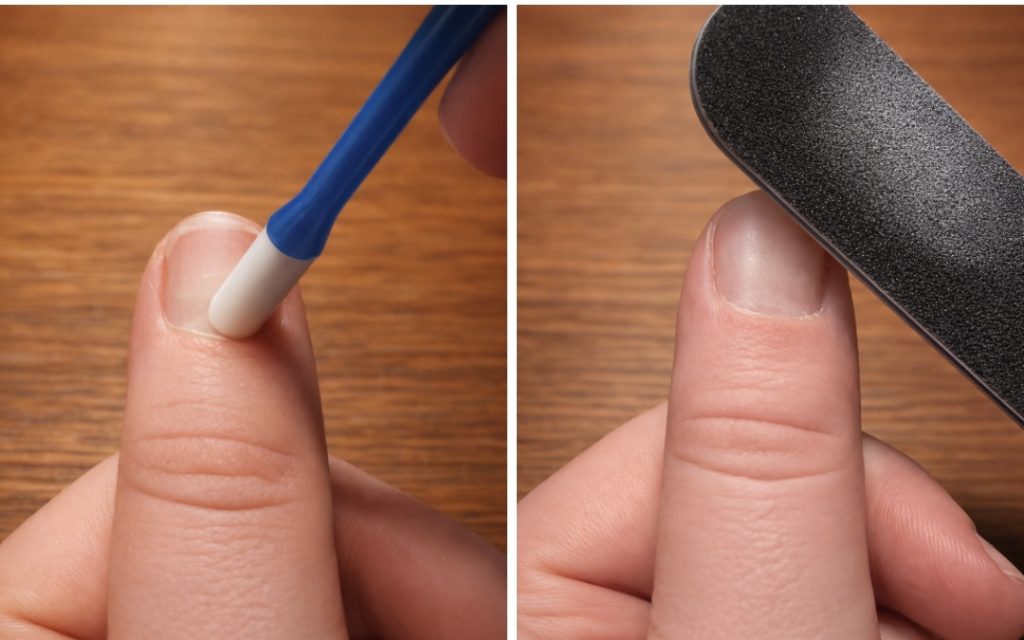
Many people skip this step, but trust me: it’s what keeps your nails from popping off after a few hours.
Filing:
Your natural nails have a smooth, oily surface. Filing removes that shine and creates tiny ridges—think of it like Velcro for your press-ons. These ridges help the glue lock the nail in place for a stronger hold.
Cuticles:
Your cuticles are dead skin at the base of your nail beds, and glue can’t stick to skin—only keratin. Push back cuticles gently to expose fresh nail, or your press-ons will lift and water could seep underneath.
Grab that file and cuticle pusher—your nails are about to get the VIP treatment!
⸻
Step 3: Optional – Dehydrate Your Nails

If you want maximum staying power, use a nail dehydrator. It removes excess oils and moisture, giving the glue a clean surface to bond to. Moisture prevents proper adhesion, so this step helps your press-ons last longer.
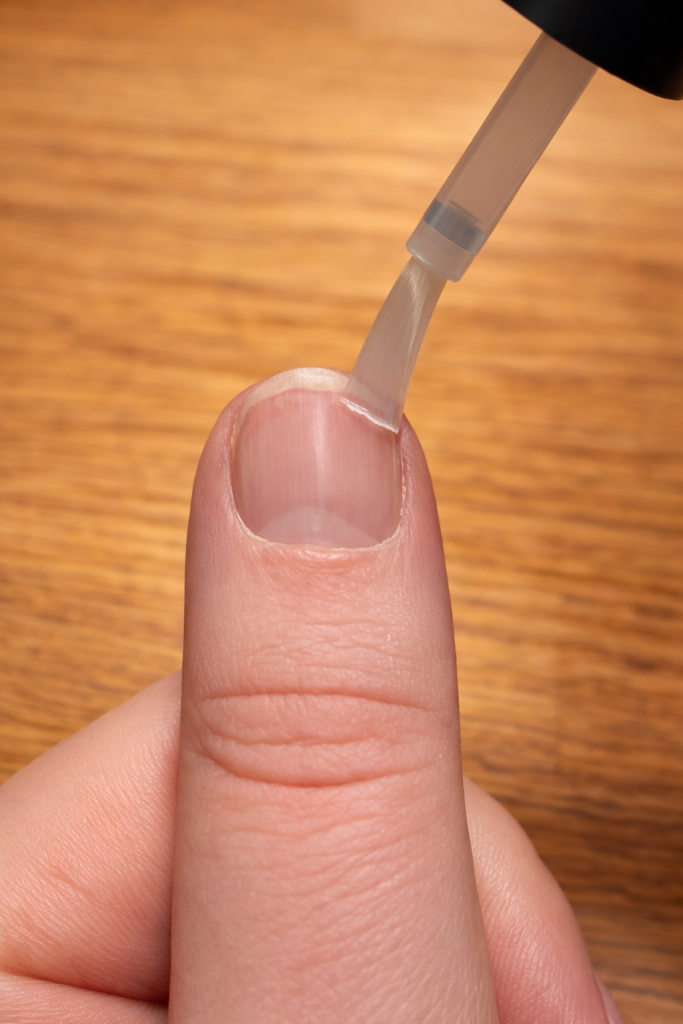
Dehydrators aren’t essential, but they last a long time and are super worth it for a polished, long-lasting look.
Here are some budget-friendly options:
This is the one I bought; I got a duo pack with primer:
https://amzn.eu/d/fRrTqqD
———
Step 4: Choose the Right Nail Size
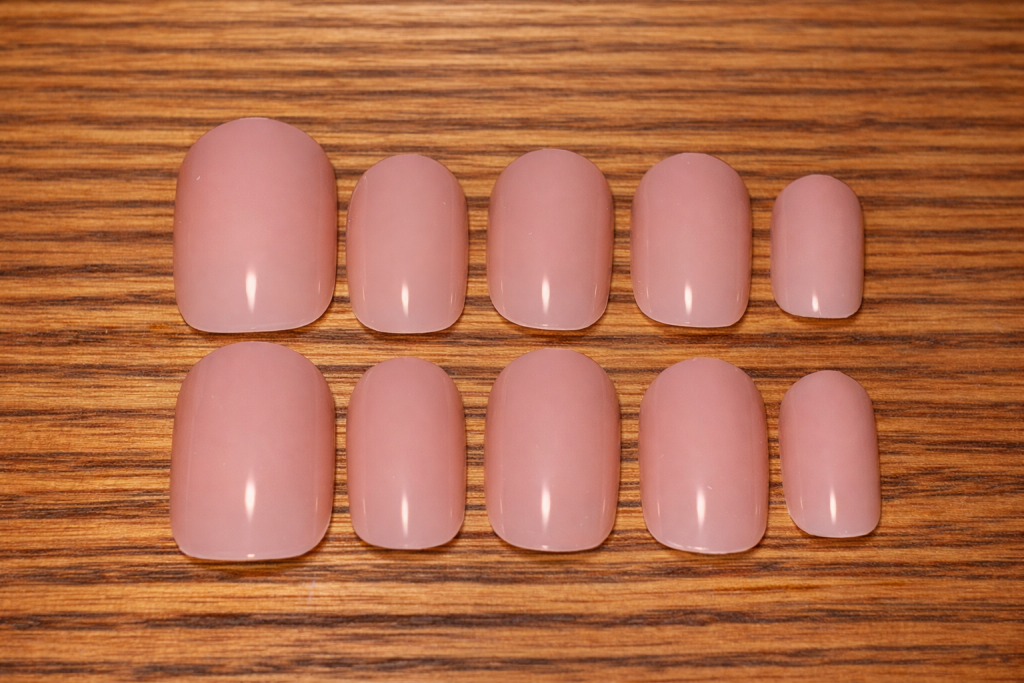
Picking the right size is crucial:
• Too big: Nail overhangs, creating gaps for lifting and water damage.
• Too small: Nail stretches and can crack or pop off.
Pro tip: Choose a press-on that matches the natural curve of your nail bed. If it’s slightly too wide, file it down to fit perfectly. Most packages come with multiple sizes, so take the time to find your perfect match.
⸻
Step 5: Apply the Nails
Finally, the easiest (but most rewarding) step—sticking them on!
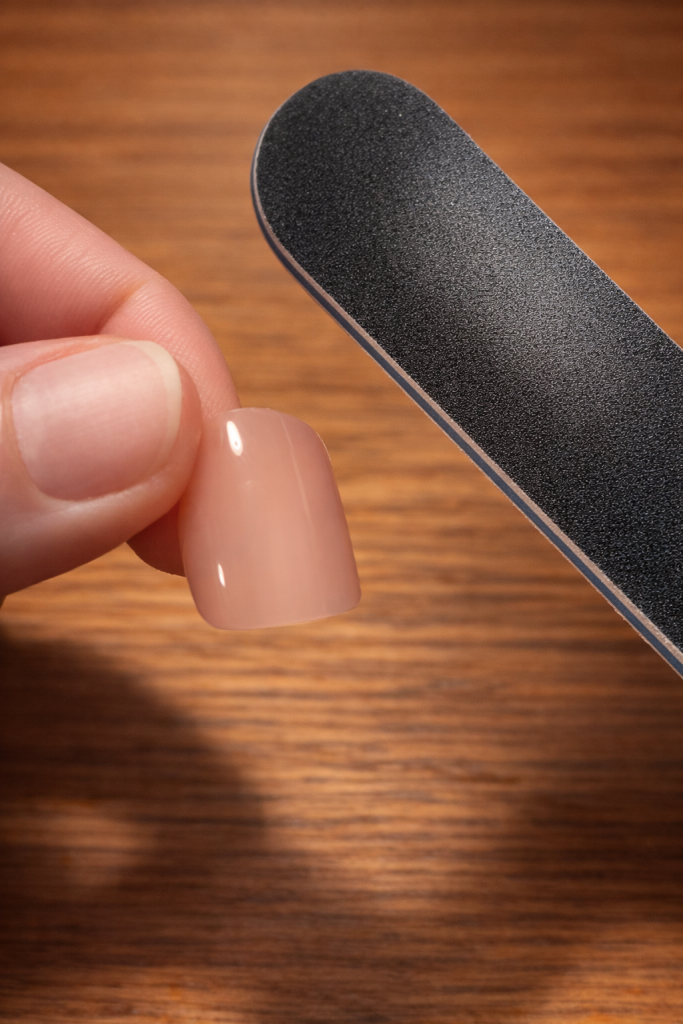
1. Prep the nail: Slightly file the inside of the press-on for better glue adhesion.
2. Apply glue: Use a small blob in the center of your natural nail. Less is more—it spreads when pressed. Avoid flooding your nail bed.
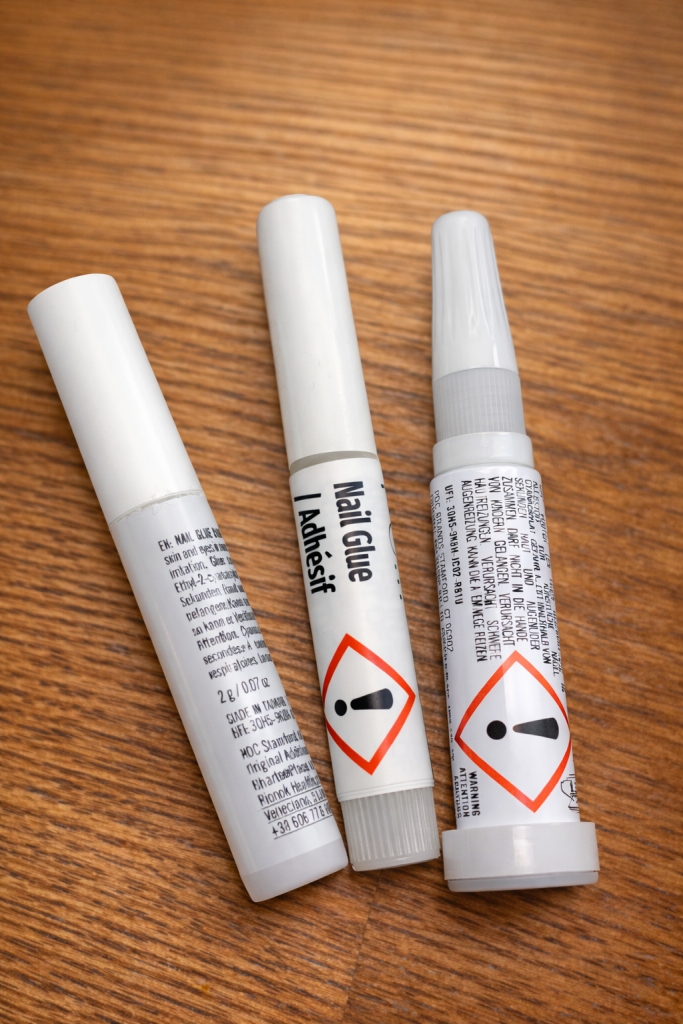
Note: Choosing the right glue is just as important as choosing the nails themselves. Most press-on nail sets come with a good-quality glue, but it helps to know what to look for. For a strong, long-lasting hold, choose a nail glue that contains cyanoacrylate, the standard adhesive used in professional nail products. A good glue will have a medium viscosity, spread evenly without flooding the cuticles, and have a mild odor that fades quickly after application. Once you find a nail glue that works well for you, you’ll notice the difference immediately. If you buy press-on nails in bulk, you can also save money by purchasing multi-packs of nail glue separately.
3. Press and hold: Place the nail and hold for 30–60 seconds. The longer the better, however it can be difficult to hold to more you do. Note that the glue continues bonding over the next 24 hours, so just be careful following application.
Pro tip: Avoid water and oils for the first 24 hours to let the glue fully set.
⸻
And That’s It!
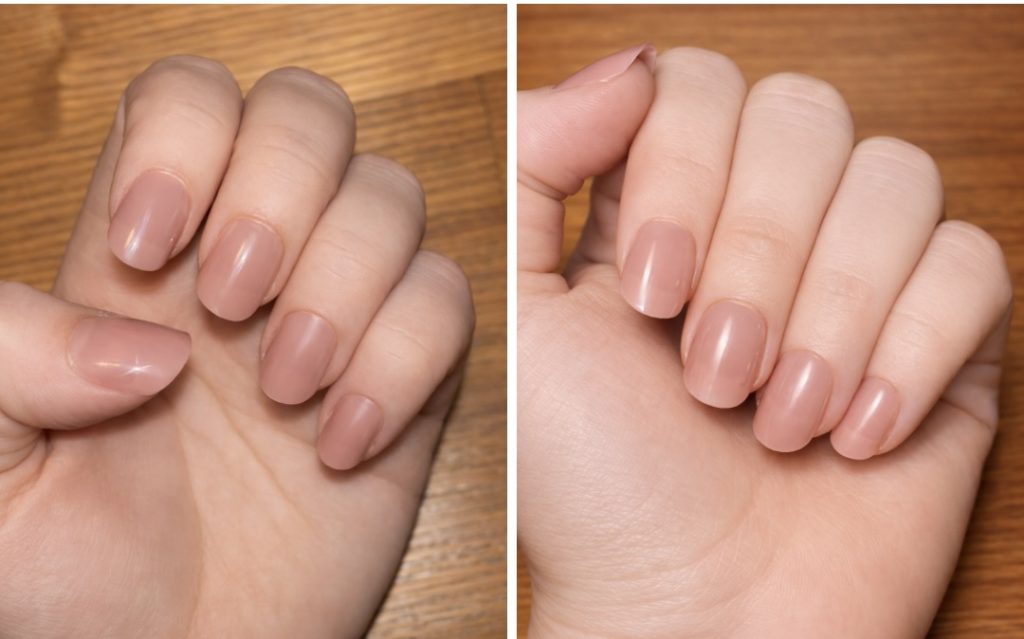
You now have a gorgeous, at-home press-on manicure that looks salon-finished for just a few pounds. While they won’t last as long as a professional set, with these tips you can enjoy 7–10 days of strong, flawless nails—perfect for day-to-day wear.
For me, £5 per set beats a salon visit any day, and it’s a great way to feel pampered without breaking the bank.
And there you have it—a simple, affordable way to treat yourself to salon-quality nails without ever leaving home. With a little prep and the right technique, press-on nails can be a game-changer for your at-home beauty routine. Give it a try, show off your glossy new manicure, and enjoy that little dose of pampering—you deserve it!
Thanks for reading!
Amy x